
该文章主要讲述在windows10+vscode下如何构建一个完整的rust编译调试环境,以及过程中可能出现的问题。
Rust构造
rust 官方提供了一系列版本、包安装管理工具,如rustup和cargo。
基本组件
rustup
初始化
从rustup.rs官网下载_rustup-init.exe_(其他平台同理),这个软件是一个初始配置包,会帮助你下载选择版本的rustup和cargo。
打开软件后会显示如下信息:
1 | Welcome to Rust! |
默认安装于用户目录下。
该软件默认检查环境变量
CARGO_HOME、RUSTUP_HOME,分别为.cargo、.rustup设置目录,按需修改(需要注意的是后期包的累积可能会占用巨量的存储空间)。
安装过程中请选择第二项 “Customize installation” !注意到default host triple中设置的是x86_64-pc-windows-msvc,本文所使用的调试器是GDB,故需要修改为x86_64-pc-windows-gnu。default toolchain请选择stable,即稳定版。nightly为前瞻版,’beta’为测试版,实际使用时我们仍需使用到nightly版,后文会提到。
下载完成后可在path中检查添加.cargo/bin以使用各种命令。
输入rustup --version以检查是否安装成功。
setting.toml
TOML(Tom’s Obvious Minimal Language) 是一个想要打败yuml的标注语言,caogo项目也有使用。
该文件位于.rustup/下。
default_host_triple: 第一次安装时设置,只能对该文件进行修改以改变默认值。default_toolchain: 默认使用的toolchain,可由rustup default <toolchain name>进行修改。
rustup命令
以下列出rustup的部分命令:
> rsutup show: 列出现在使用的和已安装的rust版本。> rustup update: 更新所有已安装版本,由于nightly偶尔会爆肝日更,所以谨慎更新。> rustup default: 设置将要使用的版本。> rustup component <sub>: 检查(list)、安装(add)、移除(remove)组建。
加速
此处使用科大源为例,修改PATH如下:
RUSTUP_DIST_SERVER:https://mirrors.ustc.edu.cn/rust-staticRUSTUP_UPDATE_ROOT:https://mirrors.ustc.edu.cn/rust-static/rustup
将同时加速cargo和rust,下载慢的可以体验一下w。
Cargo
cargo既是一个类似于npm、pip的包管理软件,又是一个像marven一样的项目框架。一个> cargo help可以让你懂得它有多nb。
1 | build Compile the current package |
更详细的介绍……点❤我❤看❤文。
集成于VS Code
再此之前,先设置一遍可能用到的环境变量。
RUST: 某toolchain的目录,如%USER%\.rust\toolchains\stable-x86_64-pc-windows-gnu。RUST_SRC_PATH: 改版本rust的源码目录,如%RUST%\lib\rustlib\src\rust\src,若你的rustlib中没有src,请执行> rustup cpmponent add rust-src。RUSTBINPATH:%CARGO_PATH%\bin。
好,打开VS Code!
插件配置
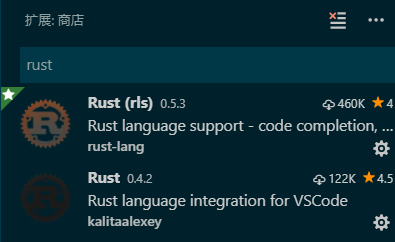
商店搜索前两个就是几十万人下载的工具,两个都装上吧?前者是官方的包括rls在内的综合插件。后者虽然是第三方,但功能不比官方少。
你需要在settings.json文件中选择性键入以下内容(为第三方插件配置而不是官方):
1 | "rust.mode": "legacy", |
很巧妙的是官方插件会为你提示是否提供权限安装nightly,请选择允许,并把你的default toolchain设置为__nightly__。
1 | > rustup default nightly |
漫长的安装完成后,写一个小程序试一试。
main.rs
1 | fn main(){ |
至此,基本能实现实时提示错误、高亮、用户片段。
常见错误
官方插件提示 RLS could not set RUST_SRC_PATH for Racer because it could not read the Rust sysroot.
尝试使用以下方法:
- 使用管理员模式启动Vs Code。
- 确定各path位置正确。
- 添加setting.json条目
"rust-client.channel": "stable",或nightly。 - 重新使用cargo建立一个项目
错误原因如下
该插件 readme文件列出了如下依赖:
- Rustup,
- 一个toolchain (插件会在获得权限后自动安装),
- RLS, rust-src, rust-analysis组件.
待补充
调试
LLDB很棒,但是有请我们的TDM-GDB出场(打扰了)。
从sourceforge上下载后,解压得到bin、gdb64、share至某目录(我的是D:\env)。
配置rust-gdb
之前下载的rust源码(%rust%\lib\rustlib)提供了一套gdb配置。
修改gdb64\bin目录下的gdbinit文件,在末尾添加以下代码:
1 | python |
执行(> bin\gdb.exe),若能输出”– loading rust pretty-printers –“并没有报错,说明gdb工具配置成功。
配置Vs Code
安装Native Debug插件( ext install debug)。
用Vs Code打开你的Cargo工程,添加调试配置GDB,将target指向生成的exe文件,将gdbpath设置为刚刚配置的gdb.exe。
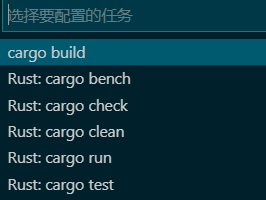
添加一个task,选择cargo build,设置为preLaunchTask。
这时你的launch.json大致如下
1 | { |
快快创建断点测试一下吧!